Ahhhh . . . the joys of photographing food. As much as every foodie loves those shiny bright marble counters, sometimes you need a more rustic, matte setting to show off some home-cooked food. Bonus points when rolling up your sleeves and getting your DIY on means saving some serious cash. (Have you SEEN what food photography backgrounds go for these days??? Yeesh.)
For this background, I picked up a piece of plywood from Home Depot. (Dear Mr. Home Depot man, I sincerely thank you for your patience as I shifted board after board after board until I found the board with the perfect grain. Bless you.) I had Mr. Super-Nice-Home-Depot-Man cut my board down to 2′ x 3′. This size is perfectly easy to store but gives me some leeway on food placement.
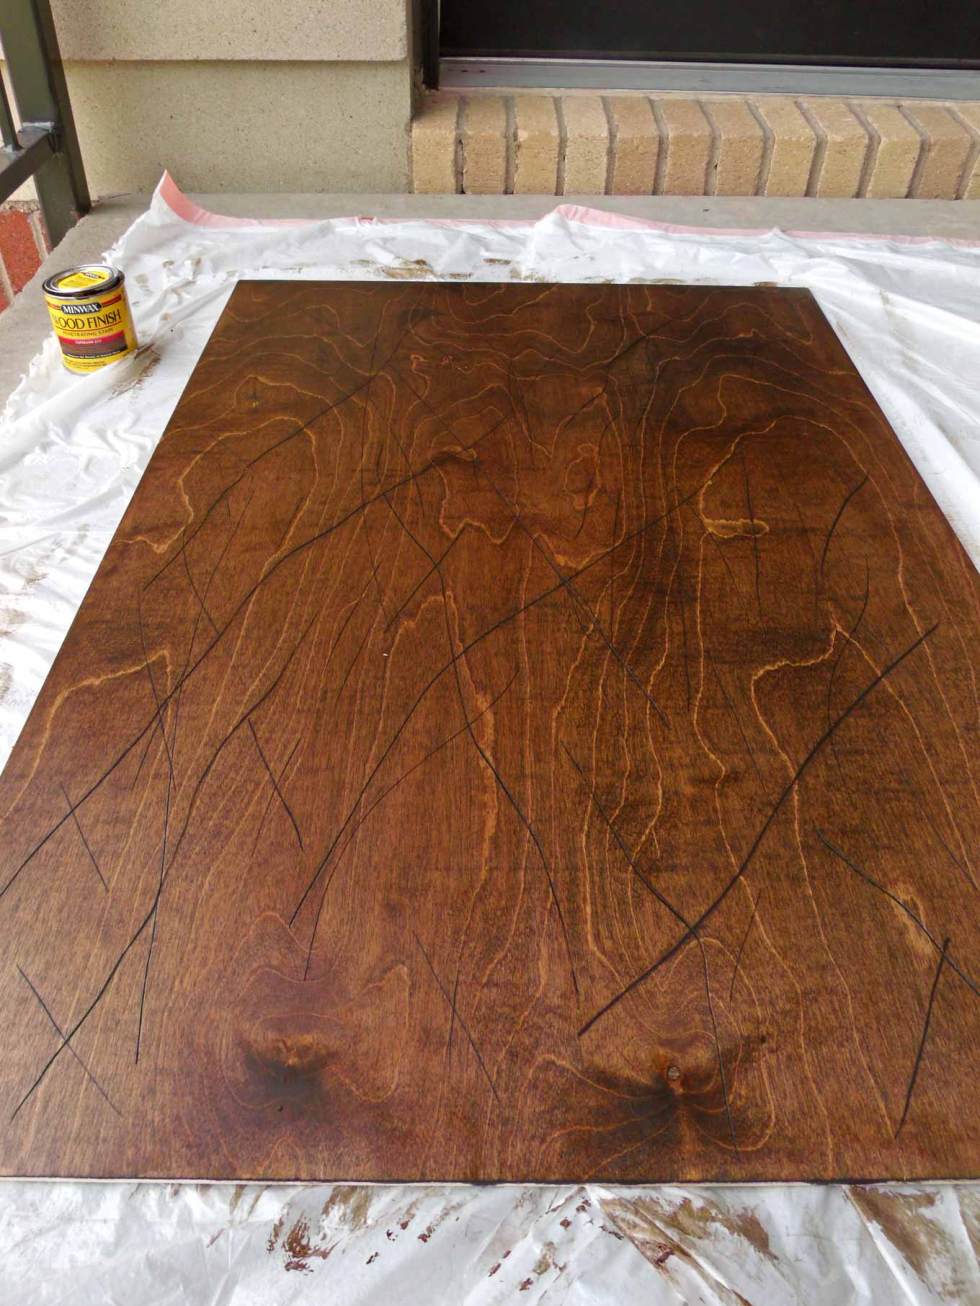
I knew I wanted a medium darkness for the wood without any colored overtones, like red. But I also knew that I wanted a thrashed look to add some movement in the photos. Enter stage right: flat-head screwdriver and David’s pocket knife. Mikaela . . . wielding a knife . . . on the porch . . . David was quite amused when he heard my “hi-yah”s and my “take-that”s and came out to find me slashing and stabbing a piece of wood with a big grin on my face. I highly recommend it as a form of therapy after a stressful day at work. I used both the screwdriver and the knife in order to create a variety of slashes–the screwdriver created a deeper scratch that was better at collecting stain.
To apply the stain, I used one of David’s hole-y socks. 🙂 Be sure to apply the stain in the direction of the grain–no circles. Rub the stain until it is thoroughly soaked into the wood. Be sure to give the board an hour to rest to see how dark the stain becomes. If you want it darker, continue to add thin layers of stain, being sure to add the same amounts all over the board. I used two layers of stain on my board.
 Finally, since this board is going to have food on it all the time, you’re going to want to make it such that you can wipe it down. I used a clear acrylic matte coating. This comes in either spray form or a mod-podge type form. The spray is faster. The mod-podge is longer lasting. Take your pick. I used the spray style and did three coats to make it last longer. It’s the perfect finish to the board to protect all your handy-work.
The best part? No more shooting food on the floor! Yes, all those beautiful food photos shot on a dark wood background that are up on wyldflour? The floor. Who knew wood floors are a food blogger’s best friend. (We really need to get out more, yes?)
Oh and also – be sure not to get any of the stain on your dog. It does not come out. 🙂 Happy food shooting!
DIY Food Photography Background
Materials:
- 2′ x 3′ sheet of plywood
- sandpaper (220 grit works well)
- screwdriver and/or pocket knife if you want to do some thrashing
- wood stain sample in desired color
- old sock you are willing to sacrifice to the cause
- clear acrylic matte coating (bottle or spray, e.g. tree house studio brand)
Instructions:
- Sand down edges and corners of the plywood. (Don’t want to be getting a splinter as you shift the board.)
- If you want a thrashed look, use the screwdriver and/or pocket knife to make random slashes–some long and some short–in the wood. Vary the force with which you yield the weapon in order to get an even more varied look.
- Wipe down the wood with a clean sock to remove any dust (or dog fur).
- Dip the sock into the stain and rub the stain into the wood, moving the sock with the grain. Continue to smudge the stain into the wood until it is fully soaked into the wood.
- If the stain is not gathering in the thrashing, dip the sock into the stain and dab it along the gash to let the stain pool. Then rub the sock in long swipes, with the grain, across the thrashing to remove any pooling.
- Allow the first layer of stain to dry for at least an hour. If a darker stain is desired, apply another layer.
- Allow stain to dry for 24 hours.
- Apply matte coating according to directions.
- After using the board for a shoot, wipe down with a damp washcloth. Leave in open air to dry completely before storing again.


Comments